Sunday, December 30, 2012

Mustard and Apple Baked Pork Chops

The pig is probably the animal that I eat the most of.  I'm not talking pig feet, ears, etc., but I'm willing to eat more parts of the pig than I am just about any other animal.  But, one of the cuts I really love and find to be the most versatile are chops.  Like chicken breasts, they can be doctored and cooked in just about any way that you can imagine.  Now, as much as I like pork chops and apple sauce, I decided to go with something a little more rustic.  This recipe is very simple, has few ingredients, and is almost "un-screw-up-able".  It's also delicious, as many simple recipes are.

Mustard and Apple Baked Pork Chops

3-4 pork chops (you'll see in my photos I only used 3)
salt
pepper
1/3 c. (approximately) spicy brown mustard
1 small apple
1/4 c. diced/sliced onions (your preference)
1/8 c. water or cooking sherry
Drizzle of honey

1.  Preheat the oven to 350 degrees

2.  In a baking dish, season both sides of the pork chops with salt, pepper and any other seasonings you like (I sometimes use garlic powder and/or paprika).

3.  Generously slather each side of the pork chops with about 1/3 c. of spicy mustard.  I usually just squeeze it out and use either a butter knife or a spatula to spread it on THICKLY.

4.  Cover the chops with onion, and then apple slices.  I usually place a few of the apple slices in the baking dish as well.

5.  Pour about an 1/8 c. of water or cooking sherry around the chops.

6.  Cover the baking dish and place in the oven for about an hour  Check the chops at about 30 minutes in just to make sure that the onions are getting cooked through.

7.  About 40-45 minutes into the cooking time, take the baking dish out, and squeeze a drizzle of honey over the chops.  Recover and put back in the oven for the remainder of the cooking time.

You can serve this with pretty much anything you want: baked potatoes, mashed potatoes, roasted root vegetables, broccoli and cheese, whatever!  It's delicious, versatile and easy and I hope you love it as much as I do!


Plated up with roasted root vegetables

Friday, December 28, 2012

I'm A Pepper!

Although I love Diet Dr. Pepper, it's not the subject of this post.  Yes, I am aware that the artificial sugars used to sweeten diet sodas are probably going to kill me someday, and I've made my peace with that.  Anyway, this entry is about stuffed peppers.  When I was a kid, I hated any type of pepper, no matter how it was prepared.  Coming from mostly Hungarian background, this was largely unacceptable, and I was always told that I would eventually learn to love them.  Thankfully, this was one of the times my mother was right (because the gypsies never did come and take me, unless of course you count all that time I spent at Gram's house as a kid).

As an adult, I enjoy most I dishes involving peppers, and am lucky to be married to a guy who really likes them too.  I made stuffed peppers a few weeks ago because my old recipe had gluten in it due to the use of condensed tomato soup.  However, that version was just not saucy enough for my husband.  Peppers were still on sale the last time I was at the store, so I decided to give it a other shot.  This version got the husband seal of approval and was made from basic pantry ingredients.

Gluten Free Stuffed Peppers

6 bell peppers (any color)
1lb. ground meat (I use beef)
1 1/2-2c. cooked rice or quinoa
1/4c. diced onion
1/2c. diced yellow squash (optional)
1 (14.5oz.) can of diced tomatoes
2 (8oz., or 1, 15oz.) cans of tomato sauce
Salt
Pepper
Garlic powder
Onion powder
Paprika
Shredded cheese (optional)

1.  Preheat oven to 350°F

2.  Depending on your preference, you can sauté onions in butter or oil, or you can add them later.  Today, I added the onions later in the cooking process.  If you choose to add them later, just brown your meat and drain the excess fat from the pan

3.  Add diced onion (if you didn't before), diced yellow squash (optional), undrained diced tomatoes, cooked rice/quinoa, and tomato sauce.  Stir to combine.

4.  Season mixture with salt, pepper, garlic powder, onion powder, and paprika to taste.

5.  I like to let meat mixtures and sauces get nice and cozy with one another, so I cooked this for about 40 minutes, just stirring and tasting, and adding spices if necessary (I used no salt added tomato sauce, so it required some additional seasoning).

6.  While the mixture is cooking, slice tops off of peppers, and remove seeds and ribs.

7.  Boil a large pot of water, and immerse peppers for 3-5 minutes.  Drain into colander and rinse with cold water inside and out.

8.  Dry the peppers and then place upright in a baking dish.  I stuff the bottoms of my peppers with a little cheese, particularly because some have holes in the bottom, and this prevents any of the sauce from the mixture from leaking out.

9.  Stuff peppers with meat mixture (I usually do several layers separated by a bit of cheese).

10.  Bake, uncovered in the oven for about 30-40 minutes.

11.  About 10 minutes before the end of cooking, sprinkle the top of the peppers with shredded cheese if you like.


These came out with a very moist, slightly cheesy mixture, and the peppers were very tender.  I served this with garlic mashed potatoes and green beans on the side.  Roasted root vegetables would make a great side to this as well, but all I had was carrots on hand.  I've been craving a carrot, parsnip, squash combo, so I nixed the idea and we'll have it some other time!

What I love about stuffed peppers is that it's a great comfort food and very adaptable.  Add stuff like minced garlic, and other vegetables to the mix.  I've had some yellow squash in the refrigerator, and I wanted to use it up, so I added it this time.  I only had four peppers last night when I made this, so I stuffed four, and saved the mixture.  When I go to the store today, I'll either pick up another few peppers, or I'll pile some of the mixture up on a corn tortilla and crisp it up for myself like a tostada.

I decided not to post my photos of this recipe because the ones I took yesterday came out terrible!  Apparently, I had my husband's fancy camera on a setting that caused the pictures I took to come out completely black (the lens cap was off, I swear!) and the ones that I got today show the peppers as being a little shriveled. . . which is exactly what they should look like, but admittedly, it's not the most appetizing thing in the world.  Hopefully, you'll take my word for how well they looked first time around, and next time I make them, I'll pull out the camera and come back to update the post!

Wednesday, December 26, 2012

A Tale of Two Pizzas

So, I love pizza.  I could eat pizza almost every day of the week without ever getting tired of it.  Unfortunately, I can't just order a pie from anywhere, or use refrigerated dough tubes, or pick up a CHEAP frozen pie anymore, so eating pizza several times a week really isn't a possibility.  That's probably for the better.  But, I'm certainly not ready to give up my indulgence.  However, my first try at homemade pizza dough really wasn't that successful.  When I was reading up on gluten free recipes, I read frequently that gluten free baking is all about trial and error, with a large emphasis on error.

The error in this case was mostly in the choice of gluten free all purpose flour blend.  Pizza dough recipes are pretty simple for the most part.  Flour, yeast, salt, oil, maybe a sweetener, and water. . . not really that complicated.  But, gluten free flours are different and they usually require a slightly different combination of ingredients and some additional ingredients that mimic gluten like xanthan gum, or guar gum.  Also, depending on the ingredients sometimes the dough doesn't rise well, or at all (some recipes don't involve yeast, or a rise).

Here's the recipe I used:

2 c. gluten free all purpose flour
1 1/2 tsp. xanthan gum
1 tbsp. active dry yeast
1 tsp. sugar
3/4 tsp. kosher salt
3/4 c. warm (110 degree) water
3 tbsp. olive oil (extra for drizzling)

1. Mix flour, yeast, xanthan gum, yeast, sugar and salt to combine.

2.  Add olive oil and water and mix.  Dough will be sticky.  If it's EXTREMELY sticky, add additional flour

3.  Place dough in oiled bowl, turn to coat.  Cover with a towel and place bowl somewhere warm to rise for an hour.

4.  Wrap risen dough in plastic wrap and chill for at least an hour

5.  Roll dough between two pieces of plastic wrap.  Roll edge to create crust.

6.  Brush dough with olive oil.  Blind bake at 400 degrees for 5-7 minutes.  Remove from oven.

7.  Top with sauce, cheese and other toppings.  Return to oven and bake until cheese is melted, toppings are heated, about 5-7 minutes.

This seems very typical for pizza dough recipes.  A lot of gluten free crusts I have seen though don't recommend creating a rolled crust.  Since delicious, puffy crusts are one of my favorite things about pizza, I was looking forward to having this crust work out.  I like thin crust, but a delicious pan style or Chicago style deep dish really puts wind in my sails when it comes to pizza.  But this was just not meant to be.

I don't necessarily think that it's the recipe.  I think the choice of flour may have had a lot to do with it.  But I saved a few crusts so my husband could try it, so I could see whether it was me, or the recipe that was off.  My husband replied that it was the worst pizza that he had ever had.  Some people say that there's no such thing as bad pizza.  I beg to differ.  There is such a thing, and it came out of my oven last Tuesday.

Not for pizza.
Maybe this flour is okay for SOME pizzas, but just not this particular recipe.  I'll have to try this blend in other recipes to see whether it's something that I'm going to continue to use, or whether I'm going to move on to another product.


So, this post is titled "A Tale of Two Pizzas".  The second pizza that I'm reviewing is Kinnikinnick ready made crusts.  When I first decided to go gluten free, I knew that I would be tempted to have pizza.  I wanted to make sure that I had something on hand that was ready made, and foolproof.  I bought a four pack of these crusts at Whole Foods in the frozen section for about $9.00.  These are single-serve portions of pizza crust that do not require rolling out or blind baking.  They're essentially little rectangles that are ready to top, bake, and eat.
Delicious.
Although I love these crusts, I'm not going to throw in the towel on a homemade pizza dough.  I have had several people make excellent suggestions about different recipes that I can try next, and I'm always up for eating pizza, so I'll have plenty more recipes and reviews!

Monday, December 24, 2012

Hang on Sloopy!

I traveled for the holidays this year to my home state of Ohio.  For those that don't know, the state tree of Ohio is the Buckeye, and it is the mascot of "THE Ohio State University" where almost 65,000 students are enrolled.  The Buckeye is also a fantastic confection that supposedly originated in Ohio (makes sense) and is made and available all over the U.S.  It features one of my favorite flavor combinations, chocolate and peanut butter, and is very simple.  You can find a Buckeye recipe very easily by googling, and there are a lot of variations.  I prefer my buckeyes to not be too sweet so if you prefer more sugar, feel free to add it.

Buckeyes
1 1/2 c. creamy peanut butter
1 c. butter (softened)
1/2 tsp. vanilla extract
4 1/2-5 c. powder sugar
4 c. semisweet chocolate chips

1.  In a large bowl, mix together mix together peanut butter, butter, vanilla, and powder sugar.  The mixture is going to look really dry to you, but it isn't too dry.  Just roll the mixture into balls about 1" in size.

2.  Place the rolled balls on a wax paper lined cookie sheet.  Press a toothpick into the top of the balls (these will help in dipping the balls).  Chill in the freezer 30 minutes until firm.

3.  Melt the chocolate chips either over a double boiler or in the microwave, stirring frequently until smooth.

4.  Dip the frozen Buckeyes into the chocolate until partially coated, leaving a small portion of the peanut butter mixture showing.

5.  Put the Buckeyes back onto the cookie sheet, remove the toothpick, (you can fudge over the hole if you want to) and into the refrigerator and chill until serving.
Pre-dipped Buckeye
Dipped Buckeye
A lot of folks usually smudge over the hole left by the toothpick  with a finger moistened with a bit of water
These are a great treat to share, and a lot of people enjoy them.  This recipe makes approximately 60-70 Buckeyes (depending on the size of the balls that you roll) and it can easily be doubled.  I hope you enjoy these as much as I do!

Saturday, December 22, 2012

It's 5 o'clock Somewhere

It's the holiday season, and booze abounds at parties and gatherings.  As someone who's GF, you're probably already used to bringing a little something for yourself to a party.  There are plenty of gluten free foods and drinks that everyone can partake in and enjoy, and most alcohols fit the bill.  There are four main types of alcohol: beer, wine, spirits and liqueurs.

BEER
Beer is ubiquitous at almost any party.  However, beer is usually produced by fermenting starches - usually cereal grains - which obviously can cause a huge problem for folks who are gluten free.  Because most beers are made from barley and wheat, it means that there are a lot out there that aren't safe.  But, there's great news:  There are a lot of gluten free beers!  Here's a list, courtesy of http://www.glutenfreedietfoods.com/beer_list.html.  Their list was updated in late November 2012, so the information is pretty current.  
But, just as with any other food or drink you're unsure of, if you have questions, read the labels and remember that google is your friend.  Almost every town or city has at least one little gem of a store that carries a magical selection of beers, and wines (and spirits depending on your state's liquor laws) and hopefully, there will be some gluten free beers available for you on the shelf at your favorite place.  

**A Note on Malt Beverages** - There's been some recent kerfluffle about malt beverages, specifically Mike's Hard Lemonade.  Their website claims that their Lite Lemonade, and Lite Cranberry are gluten free.  From my not-at-all-scientific research, which involved reading several blog posts and the comments following, it appears that some folks with Celiac have ingested without reaction, while some folks with just gluten intolerance have had reactions to these products.  According to the company, the products are tested below 5ppm, which is well under the limit of 20ppm needed to be considered gluten free.  But, the word MALT is in the product.  It is a MALT beverage, and that alone makes a lot of folks who are GF steer clear.  Use your own judgement with these products.  

Wine
Usually MY beverage of choice.  I never really got used to the taste of beer, but I used to drink malt beverages pretty frequently when I wanted something cheap.  But, I really love wine.  I love reds, and whites, and pinks, and pretty much whatever.  I've met a few I didn't like, but I never discriminate based on color.  The great thing is that wine is, because wine is made from fermented grapes (and sometimes other fruits) it's inherently gluten free.  There are a few notes of caution for those who are extremely sensitive.  Some wineries (usually European) sometimes use a gluten based paste to seal the oak barrels in which the wine is aged.  Additionally, some wineries use gluten in their fining process when they clarify the wine.  However, usually another protein is used.  The practices of using the gluten paste, and gluten to clarify are NOT universal in the wine making process and are definitely the exception, rather than the rule.  Because of the functions of the gluten on the rare occasions when it is used, the ppm is usually below 10.  If that makes you feel uncomfortable, feel free to google, e-mail, or call whoever you need to in order to feel sure about your decision.  Just know that almost all wines do not employ gluten in their making process.

Spirits/Liqueurs
These are unsweetened, distilled beverages, very commonly known as liquor or hard liquor, (which is not to be confused with liqueur).  Things like brandy, fruit brandy, gin, rum, tequilla, vodka and whiskey are spirits. Because spirits can be distilled from fruits, grains and vegetables, there are some that are safe for folks who are gluten free, and some that are not.  Liqueurs are sweetened distilled beverages that have been sweetened with things like fruits, nuts, spices, creams, flowers and other flavorings.  Some of them are safe for those who are gluten free and some are not.  The following is a not-at-all comprehensive list:
  • Bourbon - Makers Mark
  • Brandy
  • Cognac - made from grapes.
  • Gin
  • Grappa
  • Kahlua
  • Kirschwasser (cherry liqueur)
  • Margarita Mix:
    • Jose Cuervo.
    • Mr. & Mrs. T.
  • Martini:
    • Club Extra Dry Martini (corn & grape).
    • Club Vodka Martini (corn & grape).
  • Mead - distilled from honey.
  • Mistico:
    • Jose Cuervo Mistico (agave and cane).
  • Mixes & Cooking Alcohol:
    • Club Tom Collins (corn).
    • Dimond Jims Bloody Mary Mystery.
    • Holland House - all EXCEPT Teriyaki Marinade and Smooth & Spicy Bloody Mary Mixes.
    • Mr. & Mrs. T - all Except Bloody Mary Mix.
    • Spice Islands - Cooking Wines - Burgundy, Sherry and White.
  • Ouzo - made from grapes and anise.
  • Rum**
  • Sake - fermented with rice and Koji enzymes. The Koji enzymes are grown on Miso, which is usually made with barley. The two-product separation from barley, and the manufacturing process should make it safe for celiacs.
  • Scotch Whiskey
  • Sherry
  • Sparkling Wine
  • Tequila
  • Vermouth - distilled from grapes.
  • Vodka**
  • Whiskey - Jack Daniels
  • Wine - all wines, including port wines and sherry, are safe for celiacs.
  • Wine Coolers:
    • Bartle & James - their wine-based beverages (EXCEPT their malt beverages - read the label carefully!).
    • Boones - their wine-based beverages (EXCEPT their malt beverages - read the label carefully!)
**A Note on Flavored Rums and Vodkas** - Some flavored vodkas and rums are not gluten free. Many are, but some of the agents used to flavor the alcohol contain gluten.  Since these drinks are INCREDIBLY popular right now, it would be great to have some information about them, but a quick search of the web does not provide and easy and convenient list.  I've written on the facebook walls of three of the big companies: Grey Goose, Smirnoff and Stoli to see if I get a response about which of the vodkas are gluten free.  I'll do the same with the rums as well and report back!


There are a lot of alcohols that are safe to drink, and a lot of mixed drink possibilities for folks who are gluten free!  Just remember to use your best judgement, and e-mail, facebook or google your way to the answers you're looking for when you're in doubt!  

Enjoy responsibly!

Thursday, December 20, 2012

Cookie, cookie, cookie starts with C!

I love cookies.  Anyone that knows me really well knows that not only do I enjoy eating them, I enjoy making them.  Out of the big three (cookies, cakes and pies) I would say, (and I think my husband would agree) that I am most proficient with cookies.  Because getting into gluten free baking can be really tough, I've decided to post a recipe that doesn't involve flour.  This way, there's no searching for a decent blend of flours, or a good all purpose mix that you're happy with.  This is just every day ingredients, and very simple.

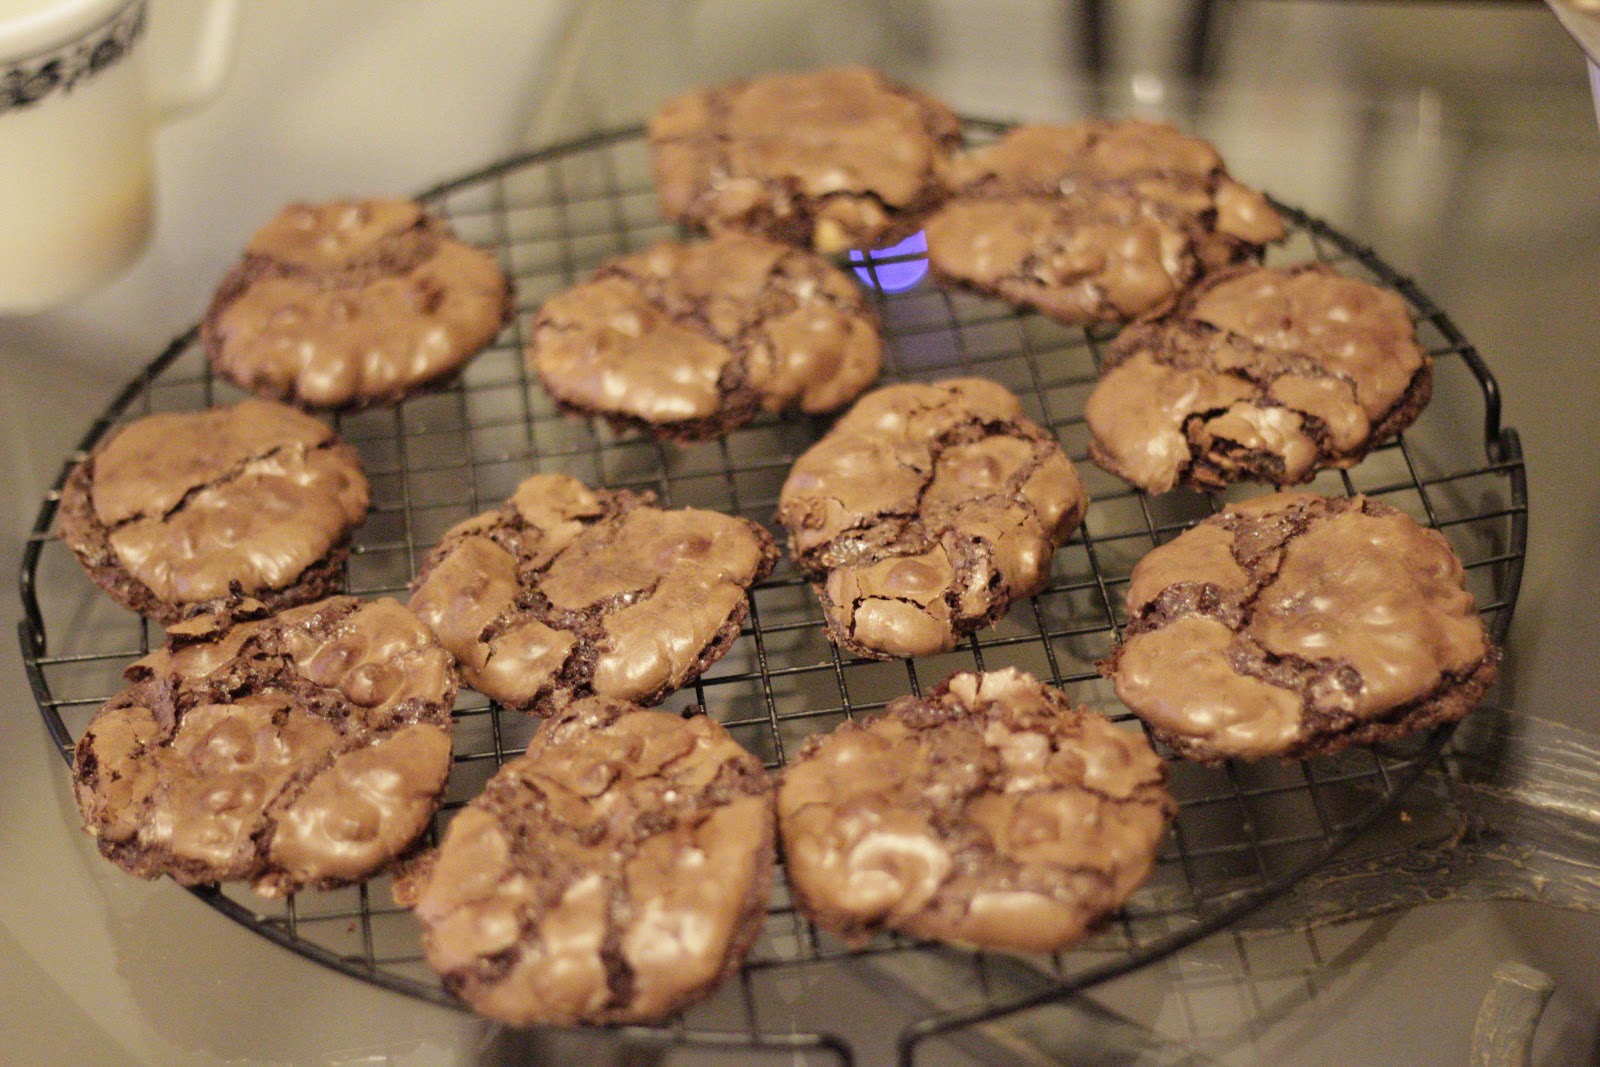
Crackle cookies are one of my favorites.  I love how chewy they are.  I used to "cheat" and make them with boxed cake mix.  They're a wonderful cookie because they're a great vehicle for any flavor chip, nuts, and even chopped up fruits if one is so inclined.  But, I didn't make traditional crackle cookies.  These cookies certainly crackle, and they are fudgy, but they're quite like a meringue.  In this iteration of crackles, I used peanut butter chips, because several of my local supermarkets didn't carry the coveted dark chocolate/mint nestles morsels that sell out every holiday season.  I managed to get my hands on one bag this year, and apparently, that was all I was destined to have.  But chocolate and peanut butter is one of my most favorite flavor combinations, and they marry so nicely in this cookie.

Chocolate Crackles with Peanut Butter Chips
3 c. powdered sugar
2/3 c. unsweetened cocoa powder
1/8 tsp. salt
3-4 egg whites at room temperature**
1 tbsp. vanilla extract
1 1/2 c. peanut butter morsels (you can use whatever flavor you choose)

1.  Preheat oven to 350 degrees.
2.  Line your baking sheets with parchment paper.
3.  Whisk together powder sugar, cocoa powder and salt.
4.  Whisk in vanilla and egg whites. **I used 3 egg whites and a full egg.  I had to add a bit of extra powder sugar and cocoa powder to compensate.  Normally, one would just add 2-3 egg whites and then decide whether or not you need the fourth.  The last time I made these, I needed that extra egg.  This time I didn't but I preemptively added it.  Ah well, extra batter, what a shame!
5.  Beat until the batter is moistened.  It should look thick and fudgy!
This batter is not done.  It's shiny and beautiful, but still too runny.
This batter IS done. 
6.  Although the batter looks thick, it probably isn't TOO thick.  But, if for some reason, you feel like it's just far too thick, add another egg.  But, I promise, it's probably not too thick.  You'll note that as you continue scooping out cookies, the batter will get thicker.  That's fine.
My precious.

This is just how it should look.  Thick and shiny!
7.  Scoop by heaping teaspoon-full onto the parchment lined baking sheets.
I wanted to make these pretty small because it's a very sweet cookie.
I would recommend a slight bit more space between than these.
8.  Bake for 12-14 minutes.  The tops should be cracked in some places, and shiny in others.  Remove from oven and allow to cool on baking sheet before removing to rack.


These cookies are delightfully crisp on the outside like a meringue, and fudgy on the inside like the best brownie you've ever had.  Any type of chip you use should work out very well in this recipe.  Tell me about your own experiences with these cookies in the comments!

Wednesday, December 19, 2012

Love, Peace and Latke Grease!

My friend Nate recently left Greensboro for the holidays and traveled to his home in Wilmington, Delaware.  Soon after, he was cooking latkes with his brother.  Even without the pictures he posted on facebook, I was hooked on the idea of making them this week.  Since my husband was going to be out on Tuesday AND Thursday nights, I thought I'd save them for today, Wednesday.  After a HORRIBLE experience with a gluten free flour blend that I used for making homemade pizza crust, I wanted to make sure that I used a more pure flour, or at the least, mixed my own blend that had been proven successful for other folks who've been at this longer than I have.  Instead of a blend though, I decided just to use white rice flour.

This is a very simple recipe, but often, simple things are very satisfying to eat.  I made about 6 latkes that were just larger than a saucer with this recipe.  You can use your choice of oil to fry in, and your amount of oil.  In fact, Nate and his brother were discussing the lack of/overabundance of oil in each other's versions of the latkes.  It's all about personal taste.  I fried these in about 1/4" of vegetable oil in a frying pan.

Gluten Free Latkes
appx. 3 russet potatoes (they were about the size of my hand in a fist)
2/3 c. white rice flour
1 1/3 tsp. salt
pepper to taste
2 eggs, beaten
oil for frying
(You can chop up an onion if you choose to, about 2/3 of a yellow onion ought to do it for this recipe)

1.  Set your oven to warm, or a low setting near 200 degrees.

2.  You can either wash and peel the potatoes or just wash them and grate them with a box grater, or use the grater attachment on your food processor.

3.  Heat the oil in the pan for frying.

4.  In a separate bowl, mix the flour, salt, pepper and two eggs.  When I did this, I got sort of a doughy paste.  That's fine.  It won't be doughy for long.

5.  Take a handful of potato gratings and squeeze out over another bowl, or the kitchen sink and then mix into the other batter ingredients.  I am not fancy. . . I did this with my hands.  Do this until you've incorporated all the potato gratings.  The batter will get a lot less doughy and a lot more fluid.

6.  Scoop out the batter by 1/4 to 1/3 cups into the oil.  Flatten either with the measuring cup, or a spatula.  While the latke shouldn't be TOO thin, a thinner, lacy latke will get nice and crispy.  Fry until golden brown, flip with a spatula or tongs (I prefer tongs).

7.  Transfer the latkes to paper towels to drain.  As they drain, place the latkes on a foil-lined sheet pan in the oven to keep warm while you finish frying.


When you're all done frying and ready to plate, try serving with applesauce and sour cream!  Nate's brother says you should mix the applesauce with the sour cream for best results, but I haven't been brave enough to try it.  I hope everyone enjoys this recipe as much as I do!  If you sub out some other ingredients, or try a different cooking method, let me know how they come out in the comments!