Showing posts with label dessert. Show all posts

Wednesday, June 5, 2013

Pineapple Orange Cupcakes

Some friends and I recently went on a girls' weekend, where one of the evenings served as a bachelorette party for one of the gals, who is getting married in October.  Because this friend eats gluten free, I wanted to make a cupcake that she could enjoy.  I won't be able to post the FINAL cupcake, because it includes a decoration that isn't exactly safe for work. sorry!  I love the flavor of the cupcakes, and the icing is also really good.  It's a sunny cream cheese frosting, but these would do just as well with a traditional buttercream.  This wonderful recipe was created by Lisa and Tim at Gluten Free Canteen

Adapted (to omit alcohol) from Gluten Free Canteen:

Cupcakes
7 oz. (by weight) sugar
Zest of one orange
Zest of one lemon
3 oz. (by weight) superfine brown rice flour
3 oz. (by weight) superfine white rice flour
1 oz (by weight) tapioca flour/starch
1 tsp baking powder
1/4 tsp. baking soda
1/4 tsp. kosher salt
6 oz. (by weight) unsalted butter, nearly room temperature
3 oz. buttermilk (if you don't have buttermilk, you can make it with 1 tbsp. lemon juice to nearly 1 c. milk)
1 tbsp. pineapple juice
1 tsp. vanilla
1/2 tsp. orange extract
3 tbsp. crushed pineapple, drained (I reserved the juice for the juice in this recipe and the frosting)

Icing
3 oz. unsalted butter
8 oz. (one brick) cream cheese, cold and broken into chunks
16 oz. powdered sugar, sifted
1 tsp. vanilla
1/2 tsp. orange extract
3 tbsp. pineapple juice

1.  Preheat to 350F, line muffin tins with paper or foil liners.
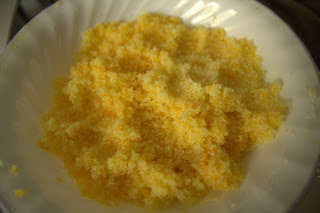
2.  Weigh sugar and mix lemon and orange zest into the sugar with clean hands.  Allow about 15 minutes for flavors to infuse into sugar.
3.  Weigh and whisk flours, baking powder, baking soda, and salt in a separate bowl.


4.  In bowl of stand mixer, combine sugar and butter.  Mix until fluffy.

5.  Add eggs, one at a time, mixing after each addition.

6.  Add buttermilk, orange extract, vanilla, and pineapple juice and mix.

7.  Reduce mixer speed to low, and add flour gradually until incorporated.

8.  Fold crushed pineapple into batter.

9.  Fill liners about 3/4 of the way full and bake at 350 for 10 minutes.  Reduce to 325 and bake for an additional 14-18 minutes or until toothpick inserted into center is clean.

10.  Cool completely on wire rack before frosting.


To Frost/Ice

1.  Mix sifted powder sugar and cubed butter until mixture resembles crumbs.

2.  Add pieces of cream cheese and mix on medium until cream cheese is incorporated.

3.  Mix orange extract, vanilla, and pineapple juice with mixer on high speed until frosting is smooth.

4.  Spread or pipe onto cupcakes and chill.  Serve at room temperature.


I was pretty happy with the way these turned out.  My non-GF husband remarked that it was a very pleasant taste, but the texture wasn't quite the same as a cupcake.  He described it as being somewhat like a cross between very moist cornbread and sponge cake.  I agree with that estimation.  It's not quite the same, but I really enjoyed it.  I would definitely make these again.  Again, I have to give credit for this recipe to Gluten Free Canteen, who have an awesome website and have been cooking and baking gluten free for many years.  People like them, who have been doing it for awhile, make it easier for those of us who are new to the lifestyle to make it!

Thursday, May 30, 2013

Product Review: Betty Crocker Gluten Free Chocolate Chip Cookies

So, this weekend, I'll be heading out to Sunset Beach, NC for a friend's bachelorette party.  This friend is ALSO gluten free, so I wanted to make some goodies that we could enjoy while we're soaking up some sun and celebrating.  I made some pineapple orange gluten free cupcakes (to be written in another post) from scratch, but decided to go with a box mix for some chocolate chip cookies.  Betty Crocker makes a line of gluten free products that have gotten pretty good reviews from other gluten free blogs I've read, so I decided to give their mix a try.

The mix requires a stick of softened butter, vanilla, and one egg.  I would recommend a few extra chocolate chips if you like a lot of chocolate or chunks (I like a very chippy cookie).  All that's required is to mix the butter, vanilla, and egg first, then add the mix.  The dough that results is very crumbly.  I found mixing it with a wooden spoon was pretty futile so I just dove in there with clean hands and squeezed the dough, which resulted in something a bit more compact.  The texture after using my hands was a lot more like what you would get with a "place and bake" cookie from the refrigerated section of the grocery store.  I formed the dough into balls, placed two inches apart (fit 6 cookies to a sheet) and baked. The resulting cookies are very good.  Generally, I like a buttery chocolate chip cookie, which is pretty flat and has a little bit of a crispy edge to it.  These cookies actually come pretty close to what I would normally bake with all purpose flour.  I definitely prefer these cookies to the Bob's Red Mill that I've made before.  Bob's Red Mill was not unpleasant, but had a beany aftertaste to it that I didn't like that well.  These don't have that aftertaste, and they're about as close as I've eaten to the scratch made, gluten-filled toll house cookies I've been making for years.

I would recommend these to anyone, and they're definitely user friendly.  If you're not gluten free and want to bake for someone who is, this is a really easy way to make something that your gluten free friend will be happy with.  If you are gluten free, you can bake these up, take them to a party, and no one would notice that they're a gluten free cookie.


Monday, January 28, 2013

Becky's Pumpkin Dip

This is not my recipe.  This is my FABULOUS friend Becky's recipe.  If you follow that link, you'll see that Becky is multitalented, and she's not only an amazing and talented baker, but she also makes gorgeous floral arrangements (like the ones that she did for my wedding five years ago).  She's a wonderful person, and I love seeing all the pictures of all the happy folks who she's helped with their celebrations.  She shared a recipe years ago for her pumpkin dip, and it is always requested by one of my mother-in-law's brothers whenever I am at a gathering that he will also attend.  It is a snap to prepare, and can be paired with about anything you like.  If you're taking this to a party where there will be non-GF friends, be sure to have two separate bowls (the recipe makes plenty to allow for that) so that you can avoid cross contamination from non-GF items that they might dip.

Becky's Pumpkin Dip
1 can (15 oz.) solid pack pumpkin (or fresh puree if you'd prefer)
1 brick (8 oz.) softened cream cheese
2 c. powdered sugar
1 tbsp. pumpkin pie spice (if you don't have this, just use a combo of nutmeg, ginger and allspice)
1 tbsp. ground cinnamon
1 tsp. frozen orange juice concentrate (I NEVER have this.  I have omitted it every time, not because I want to be unfaithful to Becky's recipe, but because I'm lazy and I just don't keep OJ concentrate in the house)

1.  Blend the cream cheese and powdered sugar

2.  Gradually add the pumpkin

3.  Mix in the spices and orange juice concentrate

Viola!

This is particularly good with a sweet crisp apple, it is also excellent with graham crackers and ginger snaps.    I recently ate it with hazelnut nut thins, and the saltiness from the cracker was a nice contrast to the spicy sweet of the dip, so if that combo appeals to you, give that a whirl.  Again, with any dip that might have gluten filled goodness going into it, just make sure to have a separate bowl for either yourself, or your other GF friends so that you don't have to worry about cross-contamination.  This makes a lot of dip, so no one will feel deprived by a smaller portion if you divide it equally among two bowls.  I also like to make this the night before and serve slightly chilled.  Enjoy this one!  It'll be a "must have" (like everything Becky makes!)

Monday, January 7, 2013

Peanut Butter Banana Strawberry "Ice Cream"

My husband makes fun of my love of ice cream.  It's completely irrational.  I could be freezing cold (and I often am) and say, "You know what I want?"  To which he'll answer either "frozen yogurt" or "ice cream".  It could be 15 degrees outside, and I'll still think, "You know what would be awesome?  Eating something that will make my insides cold, and will then make me want to curl up in the fetal position under a blanket with the cat serving as a heating/massage pad."


You know what I hate about ice cream though?  I hate when it's hard.  My sister, who has naturally perfect teeth (without any braces or major dental work), use to take an ice cream cone, and bite off a huge chunk of the ice cream right in front of me.  The sight of that always made it seem like my spine was made of glass and she threw a rock into it, crushing it into a thousand pieces.  I hated it.  This, of course, meant that she did it all the time.  I either patiently licked at the ice cream on the cone until it was soft, or just put it in a bowl and juhjed it up until it was nice and soft and creamy.  Soft serve and froyo has always been my thing because of this.

So, I'm always disconcerted when I ask my husband "You want to go get froyo with me?" (which I do almost nightly) and he says "no".  I have a great habit that's also terrible.  I very rarely buy ice cream/frozen yogurt/sherbet.  I know that I shouldn't eat it often, and I know that if I have it in the house, I will eat it often. So I just pass by the aisle and don't give it a second look, (this is also my strategy for potato chips, because I can eat a bag in one sitting and not think about it until I'm crying about what a terrible person I am an hour later).  This also means that I often don't get to fulfill my craving for delicious frozen dairy treats.

But, there is hope.  I almost always have bananas in the house.  I could eat 2-3 of them a day, and I think they're fantastic.  I will be incredibly sad when the world runs out of bananas in like 20 years.  Plantains just aren't the same.  In any case though, I almost always have bananas in the house.  So, I can almost always fulfill my "ice cream" craving.  Tonight, I remembered that I had an "ice cream" starter banana in the freezer.  I also remembered that I made a giant batch of strawberry puree for bellinis for New Year's that my husband forgot to take with us when we went to a friend's house.  And peanut butter?  Well, is there ever a time when banana and peanut butter shouldn't be combined?

Peanut Butter Banana Strawberry "Ice Cream"

1 banana, cut into coins
2-3 tsp. strawberry puree
1 heaping spoonful smooth peanut butter

1.  A day, a week, a month ahead, cut up one banana into coins and place in a sealed zip top bag in the freezer.

2.  When you're ready for your ice cream, take the banana out of the bag and place the coins in your food processor.

3.  Pulse the banana coins until they resemble soft serve.  This might take a bit.  It'll look grainy and ricey at first, but be patient, it's worth it.

4.  When you've got a smooth thing going on, add the strawberry puree and peanut butter.

You can adapt this recipe in a million different ways.  Add chocolate.  Add marshmallow cream.  Add nutella.  Add other fruits.  Add sweetened condensed milk for some dulce de leche action.  Add pork chops (Elvis would probably come back from the dead for that combo).  Whatever floats your boat.  This is another "blank canvas" type recipe that's just waiting for you to do delicious things to it.  So, go do 'em!

Monday, December 24, 2012

Hang on Sloopy!

I traveled for the holidays this year to my home state of Ohio.  For those that don't know, the state tree of Ohio is the Buckeye, and it is the mascot of "THE Ohio State University" where almost 65,000 students are enrolled.  The Buckeye is also a fantastic confection that supposedly originated in Ohio (makes sense) and is made and available all over the U.S.  It features one of my favorite flavor combinations, chocolate and peanut butter, and is very simple.  You can find a Buckeye recipe very easily by googling, and there are a lot of variations.  I prefer my buckeyes to not be too sweet so if you prefer more sugar, feel free to add it.

Buckeyes
1 1/2 c. creamy peanut butter
1 c. butter (softened)
1/2 tsp. vanilla extract
4 1/2-5 c. powder sugar
4 c. semisweet chocolate chips

1.  In a large bowl, mix together mix together peanut butter, butter, vanilla, and powder sugar.  The mixture is going to look really dry to you, but it isn't too dry.  Just roll the mixture into balls about 1" in size.

2.  Place the rolled balls on a wax paper lined cookie sheet.  Press a toothpick into the top of the balls (these will help in dipping the balls).  Chill in the freezer 30 minutes until firm.

3.  Melt the chocolate chips either over a double boiler or in the microwave, stirring frequently until smooth.

4.  Dip the frozen Buckeyes into the chocolate until partially coated, leaving a small portion of the peanut butter mixture showing.

5.  Put the Buckeyes back onto the cookie sheet, remove the toothpick, (you can fudge over the hole if you want to) and into the refrigerator and chill until serving.
Pre-dipped Buckeye
Dipped Buckeye
A lot of folks usually smudge over the hole left by the toothpick  with a finger moistened with a bit of water
These are a great treat to share, and a lot of people enjoy them.  This recipe makes approximately 60-70 Buckeyes (depending on the size of the balls that you roll) and it can easily be doubled.  I hope you enjoy these as much as I do!

Thursday, December 20, 2012

Cookie, cookie, cookie starts with C!

I love cookies.  Anyone that knows me really well knows that not only do I enjoy eating them, I enjoy making them.  Out of the big three (cookies, cakes and pies) I would say, (and I think my husband would agree) that I am most proficient with cookies.  Because getting into gluten free baking can be really tough, I've decided to post a recipe that doesn't involve flour.  This way, there's no searching for a decent blend of flours, or a good all purpose mix that you're happy with.  This is just every day ingredients, and very simple.

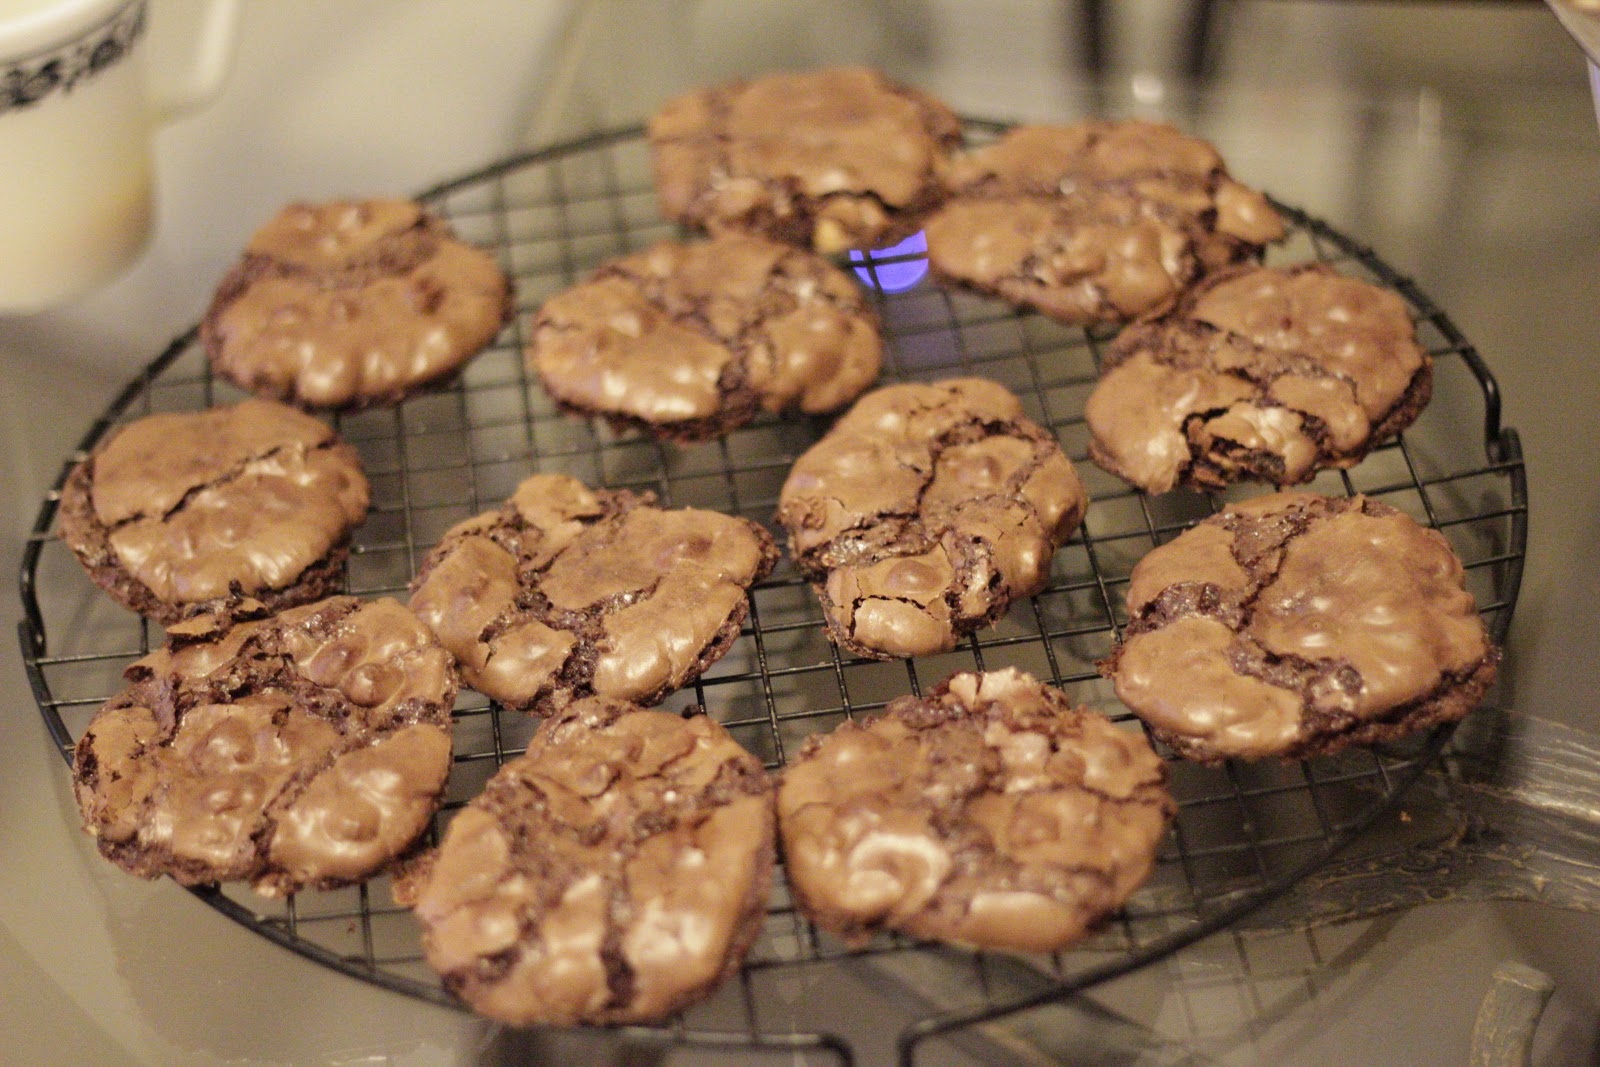
Crackle cookies are one of my favorites.  I love how chewy they are.  I used to "cheat" and make them with boxed cake mix.  They're a wonderful cookie because they're a great vehicle for any flavor chip, nuts, and even chopped up fruits if one is so inclined.  But, I didn't make traditional crackle cookies.  These cookies certainly crackle, and they are fudgy, but they're quite like a meringue.  In this iteration of crackles, I used peanut butter chips, because several of my local supermarkets didn't carry the coveted dark chocolate/mint nestles morsels that sell out every holiday season.  I managed to get my hands on one bag this year, and apparently, that was all I was destined to have.  But chocolate and peanut butter is one of my most favorite flavor combinations, and they marry so nicely in this cookie.

Chocolate Crackles with Peanut Butter Chips
3 c. powdered sugar
2/3 c. unsweetened cocoa powder
1/8 tsp. salt
3-4 egg whites at room temperature**
1 tbsp. vanilla extract
1 1/2 c. peanut butter morsels (you can use whatever flavor you choose)

1.  Preheat oven to 350 degrees.
2.  Line your baking sheets with parchment paper.
3.  Whisk together powder sugar, cocoa powder and salt.
4.  Whisk in vanilla and egg whites. **I used 3 egg whites and a full egg.  I had to add a bit of extra powder sugar and cocoa powder to compensate.  Normally, one would just add 2-3 egg whites and then decide whether or not you need the fourth.  The last time I made these, I needed that extra egg.  This time I didn't but I preemptively added it.  Ah well, extra batter, what a shame!
5.  Beat until the batter is moistened.  It should look thick and fudgy!
This batter is not done.  It's shiny and beautiful, but still too runny.
This batter IS done. 
6.  Although the batter looks thick, it probably isn't TOO thick.  But, if for some reason, you feel like it's just far too thick, add another egg.  But, I promise, it's probably not too thick.  You'll note that as you continue scooping out cookies, the batter will get thicker.  That's fine.
My precious.

This is just how it should look.  Thick and shiny!
7.  Scoop by heaping teaspoon-full onto the parchment lined baking sheets.
I wanted to make these pretty small because it's a very sweet cookie.
I would recommend a slight bit more space between than these.
8.  Bake for 12-14 minutes.  The tops should be cracked in some places, and shiny in others.  Remove from oven and allow to cool on baking sheet before removing to rack.


These cookies are delightfully crisp on the outside like a meringue, and fudgy on the inside like the best brownie you've ever had.  Any type of chip you use should work out very well in this recipe.  Tell me about your own experiences with these cookies in the comments!